I had no idea of this beautiful craft until my friend
Ramya taught me this. She is a gem of a friend, humourous, active and very talented. Thankyou ramya for teaching me this beautiful craft.. Now i can create my own matching jewels. :)
Here is a picture of my First jewellery set - Chain, Bracelet and Ear rings

One more look with a different background.


These umbrellas are used for decorating milkshakes and desserts. I have a hobby of collecting those cute little umbrellas whenever i drink or eat some desserts at the restaurants. But, those here are handmade ones to decorate the juices and shakes i make for my
Cooking Blog.
Materials Required:
- Colourful sheet of paper - 1
- Markers
- Toothpicks
- Glue
- Scissors

How to make it:
Mark the round shape on a designed sheet of paper (use a magazine paper for shiny surface). Cut out the round shape and fold into two. Open and again fold on the other side and repeat until you get eight lines. Prick a toothpick at the center and apply little glue to make the toothpick stick with the paper. Open to get an umbrella.

I'm sending this to Shama for her
Paper Crafts event.


Materials Required:
- Tissue paper
- Scissors
- Thread

How to make it:
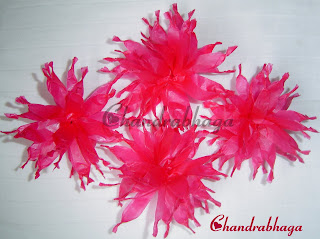
Cut a long strip (about 15 inches length and width of about 5 inches) out of the tissue paper. Fold it into two. Now you have a 2-ply sheet of dimension 15* 2.5 inches. Cut the full stretch of the paper until the center (not on the folded side) with frequent intervals (about 1.5 cm). Twist the ends as shown in the above picture. Starting at an end, crush and roll it to make a flower (Insert a metal string while rolling if you need a stem). Tie with a thread.
I used the festive tissue papers that is used for stuffing tote bags and gift boxes.

I'm sending this to Shama for her
Paper crafts event.


Materials Required:
- Salt can - 1 ( made of cardboard)
- Blank white paper
- Small piece of cardboard
- Glue
- Scissors
- Colours ( crayons or water colours)
How to make it:
Empty salt can, peel the outer covering and take off the metal closure on top. Make an opening (not too big) until the center of the can. Take a small piece of cardboard and make a slot at the center. Glue it on, top covering the opening. Paint the can with colours of your choice. Draw the required pictures on a blank white paper. Colour and cut out the pictures. Stick the pictures on the can. Let it dry.
My theme is space travel. Here, i used black paint for the can and yellow for the borders, top and bottom. For galaxy effect, i did spray painting with white colour. I drew some planets and space craft on a white paper, coloured them using water colours and cut them to stick in the can.

I'm sending this to Shama for her
Paper Crafts event.


